Ever asked anyone to make a noise like a coffee pot? Chances are, they’ll have made a noise, not unlike a stovetop percolator. (Yes, we know, we’ve maybe listened to a few too many BBC radio sound effects in our time. We’ll leave the sound of clip-clopping horses for another time.)
Anyway, we don’t know about you, but one of the things that has helped us to both get going and keep going these last few weeks is our coffee. The stronger and fiercer the better. And it doesn’t really get much fiercer than coffee made in a percolator. So we thought it was high time we talked you through how to make coffee in a percolator.
How Does A Coffee Percolator Work?
Percolators are one of the most basic coffee brewing methods you can imagine. In its simplest form, a percolator is a kettle with a system that draws hot water up, allowing it to then trickle through the coffee grounds until your drink is brewed.
The word percolate means to filter gradually through a porous substance or surface. In this scenario, it’s the ground coffee beans that provide the porous substance.
From the pot with the small chamber at the bottom of the device, a tube or central chamber connects to the top. The top of the percolator contains another chamber, this time holding ground coffee. The entire mechanism is placed inside a kettle. Every stovetop coffee percolator consists of a lower chamber, an upper chamber with a lid, and a funnel filter and basket mechanism.
The water is added to the bottom chamber, heated, and then pulled up the tube, where it filters through the coffee in the upper chamber. If you’re wondering who invented the percolator in the first place, there’s an interesting historical debate going on.
Depending on who you believe, it was either a British soldier by the name of Thompson, or an American called Mason.
How To Use A Coffee Percolator
While some folk might think percolator coffee is a little too fierce, as with any recipe, a lot of the success is down to the preparation. Using the best beans you can buy goes without saying. That taste that some folks find a little bitter? If you take your time, prepare well, and use really good coffee beans, your beverage will be round and rich, not rancid.
One major advantage of using a percolator is that you don’t need any fancy kit. You don’t even need electricity, as long as you’ve got a heat source of some kind. Yes, it’s a little retro – but retro doesn’t necessarily mean outdated. It can simply mean classic.
And we have a strong suspicion that traditional methods of doing, well, pretty much everything are about to make a comeback in a major way.
You do have to keep your eye on the ball when it comes to percolator coffee. Or rather the coffee pot. Not that that’s a bad thing. It does, however, mean you’re the one responsible for the end result.
Back To Basics
Firstly, you need your pot to be as clean as it can be. And on the subject of clean, the water should be as cold as you can find, and ideally filtered. (We know of some coffee aficionados who swear by distilled water.)
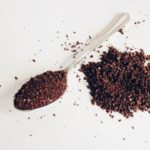
When it comes to coffee beans, you’ll get the best results with a medium to coarse grind. You’ll also generally find that a darker roast is better.
If you’re wondering about the coffee “golden ratio”, as it were, then 1 tablespoon of coffee to every 8 fluid ounces of water should give you around 6 small cups. And when we’re talking about cups, we mean small espresso sized cups.
So that’s around 1 fluid ounce, maybe slightly more. Not that anything is stopping you from using those small cups as a base for other coffee drinks like American, latte, cappuccino, mocha…
It’s All In The Prep
Before you even start, think about how much coffee you’re planning on brewing. If you add too much water, you’ll end up with a thin sort of liquid that’s more like colored water than coffee. And if you don’t add enough water, that’s when you’re more likely to get that bitter taste often associated with coffee percolators.
Firstly, add your cold, clean water to the bottom chamber and place the funnel filter assembly on the top. Add your coffee grounds to the basket. (We can never resist inhaling the coffee aroma before we start, but maybe that’s just us.)
Use a coffee spoon to gently press on the basket surface, but don’t pack the grinds too firmly. Pop the upper chamber on top of the bottom chamber and basket, and close the percolator. Add the percolator to the heat source. If you’re using a stovetop, then a medium heat is best.
You need to heat up the water slowly. You adjust the level of the heat as the coffee is brewing – what you don’t want is boiling water. As the water heats, it should start making a sort of puttering, sputtering noise, with bubbles appearing at short intervals.
Hubble, Bubble, Boil, And Brew
If the bubbles are too close together this indicates that the water is perilously close to boiling – you’ll need to adjust the heat. Turn off the heat source and let the brew continue to sputter for a few minutes.
For strong, rich percolator coffee, we usually find about 10 minutes is ideal. If you’d rather have a milder brew, then reduce the time. It might take you a few tries before you have it spot on.
You do need to make sure you remove the coffee grounds before you drink up. Or before you add your milk, sugar, or syrup. Open the percolator and leave the bottom chamber to one side.
We love the sustainability and simplicity of percolators. You don’t need filters, pods or discs, and they’re super-easy to keep clean. So even if you’re in a hard-water area, you don’t need to worry about scale building up.
No Worries
A few aspects of percolator coffee might seem somewhat strange. For starters, sometimes the coffee looks a little cloudy, especially just after brewing. That’s all connected to the fact that the coffee circulates through the filter basket.
During the brewing process, the boiling water continues flowing. To combat this, just remove the pot from the heat. Leave it to settle for a couple of minutes. The cloudiness will dissipate.
Then there’s the fact that you’ll have a little sediment in your cup. This is also a result of the filtering process, and nothing to worry about. A few fine grounds remain in the brewed coffee.
Types Of Percolators – What’s The Difference?
For generations, until the automatic drip machines took over, the stovetop percolator and the electric-powered cousin, were the preferred means of brewing coffee. We’ve mainly talked about stovetop percolators so far, but they’re not the only option. There are a couple of others we’d like to draw to your attention.
Electric percolators are percolators that (you guessed it) run on electricity. (Incidentally, did you know electricity was first harnessed during a kite-flying experiment in 1752?)
In electric percolators, the boiler stays inside the machine. If you were in a reverse engineering frame of mind and decided to take one apart (making sure it wasn’t plugged in, obviously!) you’d also find all kinds of electronics, heating elements, and motors.
In a siphon brewer, heat from the steam means that hot water gets forced up the stem of the container with the coffee grounds, mixing with that aromatic substance. The water vapor then rises, enters the brewing chamber, and then cools. Abracadabra! Delicious coffee.
There’s also the Moka pot – you may well recognize these distinctively-shaped and deceptively powerful little devices. They were created in 1933 by Italian Alfonso Bialetti.
In a Moka pot, there’s a bed of coffee grounds in between the pressure chamber and the receiving chamber. From the bottom of the brewer, heated water vapor rises through the coffee. You get strong, slightly bitter, slightly cloudy coffee. (It’s still delicious though.)
Why Use A Percolator?
The real question is, why not use a coffee percolator? You know exactly what you’re going to get with these classic devices.
They’re also delightfully durable. Mostly they’re made of stainless steel, but a few are made of enamelware. Oh, and they’re super portable – take them on vacation, camping, or even slip them into your messenger bag to make your workplace just that little more bearable.

Hi my name is Larry, a coffee aficionado from the US. I have already visited Colombia, Sumatra, Guatemala, Costa Rica, Ethiopia and Jamaica in my pursuit of finding the best-tasting coffee beans. I currently write from Bali and enjoy the relaxed life that you can only find in Canggu. Welcome to my coffee world!


